
Transplanting cannabis seedlings is a crucial step in the cultivation process that significantly impacts the health and productivity of your plants.
The Importance of Transplanting Cannabis Seedlings
Proper transplanting ensures that seedlings develop robust root systems, allowing them to access nutrients and water more efficiently as they grow. This step not only helps in preventing root-bound conditions but also promotes healthier and more vigorous plant development.
The transplanting process involves several key stages, each requiring careful consideration to minimize stress and ensure a smooth transition for the plants. From starting seedlings in optimal conditions to selecting the right containers and soil, every detail matters. Proper post-transplant care, including adjusting environmental factors and monitoring plant health, is essential to mitigate shock and support ongoing growth.
This blog will guide you through the entire transplanting process, starting with how to germinate and care for seedlings, moving on to the actual transplanting techniques, and finally addressing post-transplant care and nutrient management. By following these best practices, you can maximize the potential of your cannabis plants, ensuring a bountiful and high-quality harvest.
Starting Cannabis Seedlings
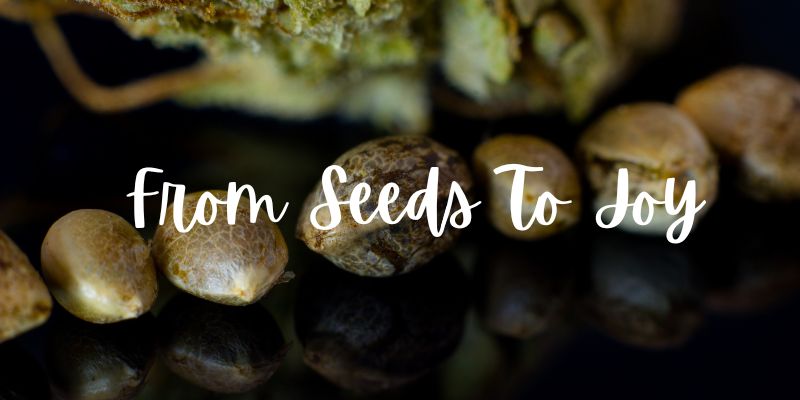
Criteria for Choosing High-Quality Seeds
Choosing the right seeds is the first step toward a successful cannabis grow. High-quality seeds are essential for producing healthy plants with optimal yields. Here are some key criteria to consider when selecting seeds:
- Genetics: The genetic background of the seeds determines the plant’s characteristics, including potency, flavor, and resistance to pests and diseases. It’s important to choose seeds from reputable sources known for their quality genetics.
- Appearance: High-quality seeds are typically dark brown or black, with a hard outer shell. They should be free from cracks and damage. Immature seeds tend to be lighter in color and may not germinate as reliably.
- Freshness: Fresh seeds have a higher germination rate compared to older seeds. It’s advisable to purchase seeds from recent harvests and store them in a cool, dark place until you’re ready to plant them.
- Source: Always buy seeds from trusted suppliers who have a track record of producing reliable and consistent products. Avoid unknown or dubious sources that might offer low-quality seeds.
Importance of Genetic Quality
The genetic quality of your cannabis seeds plays a pivotal role in the overall success of your cultivation efforts. Superior genetics lead to plants that are more robust, have higher yields, and plants that possess desirable traits such as specific cannabinoid profiles and terpene content.
Mosca Seeds, a leader in cannabis genetics, offers a wide selection of top-quality seeds known for their exceptional performance. Whether you’re a novice grower or a seasoned cultivator, starting with Mosca Seeds ensures you’re planting the best possible genetics for a successful harvest.
Germination Methods
Successfully germinating cannabis seeds is a critical first step in the cultivation process. There are several effective methods to germinate seeds, each with its own advantages.
Here are some of the most popular germination techniques:
Paper Towel Method
The paper towel method is a widely used and highly effective technique for germinating cannabis seeds.
Steps:
- Moisten Paper Towels: Take two clean paper towels and moisten them with distilled water. The towels should be damp but not soaking wet.
- Place Seeds: Place the cannabis seeds between the two moist paper towels.
- Store in a Container: Place the paper towels with the seeds in a plastic container or between two plates to create a humid environment.
- Keep Warm: Store the container in a warm, dark place. The ideal temperature for germination is between 70-85°F (21-29°C).
- Check Daily: After 24-48 hours, check the seeds daily to ensure the towels remain moist and to monitor for sprouting. Typically, seeds will sprout within 3-7 days.
Direct Soil Planting
Direct soil planting is a natural method that involves placing seeds directly into the growing medium.
Steps:
- Prepare Soil: Fill small pots or seedling trays with a light, airy soil mix designed for seedlings.
- Plant Seeds: Make a small hole about 1/4 inch (6mm) deep in the soil. Place the seed in the hole and lightly cover it with soil.
- Water Gently: Moisten the soil using a spray bottle to avoid disturbing the seed.
- Maintain Conditions: Place the pots in a warm, humid environment with indirect light until seedlings emerge, typically within 5-10 days.
Using Starter Cubes
Starter cubes provide a convenient and controlled environment for germinating seeds. They retain moisture well and allow for easy transplanting.
Steps:
- Hydrate Cubes: Soak the starter cubes in distilled water until fully hydrated.
- Insert Seeds: Place a cannabis seed into the hole of each cube.
- Maintain Humidity: Place the cubes in a seedling tray with a humidity dome to maintain high humidity levels.
- Provide Light: Place the tray under grow lights or in a location with indirect light. Seeds should sprout within 3-7 days.
Soak in Water & Hydrogen Peroxide Method (Mosca Preferred Method)
The soak-in-water and hydrogen peroxide method is a preferred technique for germinating cannabis seeds, combining the benefits of soaking and direct soil planting.
Steps:
- Prepare the Solution: Use a small, 8 oz. cup filled with distilled or reverse osmosis water at room temperature. Add 20% hydrogen peroxide to the water.
- Soak the Seeds: Drop your cannabis seeds into the cup and label it. Check the seeds every 8 hours.
- Encourage Sinking: Swirl the water gently to encourage the seeds to sink to the bottom of the cup.
Within 12 to 18 hours, you should begin to see sprouts, which look like small tails, emerging from the seed casing. Once the tap root starts to appear, carefully remove the seeds from the water and plant them into your growing medium with the root facing downward. Water the soil, coco, or grow medium with distilled water for the first few weeks to ensure healthy seedling development.
Initial Seedling Care
Proper care during the seedling stage is crucial for developing strong, healthy cannabis plants. This involves managing light, temperature, humidity, and watering practices.
Light and Temperature Requirements
Seedlings require a gentle, full-spectrum light source. LED grow lights or fluorescent lights are ideal as they provide the necessary light spectrum without generating too much heat.
- Duration: Seedlings need about 18-24 hours of light per day to promote healthy growth. A timer can help maintain a consistent light schedule.
- Distance: Keep lights at an appropriate distance to prevent burning the seedlings. For LED lights, maintain a distance of 24-36 inches (60-90 cm). For fluorescent lights, a distance of 4-6 inches (10-15 cm) is typically sufficient.
Ideal Temperature and Humidity Levels
- Temperature: The optimal temperature range for cannabis seedlings is 70-80°F (21-27°C). Maintaining this range helps prevent stress and promotes healthy growth.
- Humidity: Seedlings thrive in a high-humidity environment, around 60-70%. Using a humidity dome or misting the air can help maintain these levels.
Watering Techniques for Seedlings
Proper watering is essential for seedling health. Overwatering is a common mistake that can lead to root rot and other issues.
Techniques:
- Moist but Not Soggy: Keep the soil or growing medium consistently moist but not waterlogged. Overwatering can drown the roots and hinder oxygen uptake.
- Spray Bottle: Use a spray bottle to gently mist the soil, ensuring even moisture without over-saturating the medium.
- Drainage: Ensure that the pots or trays have good drainage to prevent water from pooling at the bottom.
By following these guidelines for germination and initial seedling care, you set a solid foundation for your cannabis plants, ensuring they grow strong and healthy as they transition to the next stages of development.
Preparing for Transplant
Proper preparation is crucial to ensure a successful transplant process. Understanding when to transplant, selecting the right containers, and preparing the soil are essential steps to avoid stress and promote healthy growth in your cannabis plants.
When to Transplant
Signs that Seedlings are Ready for Transplant
- Root Development: Examine the root system to determine if the roots are starting to outgrow their current container. If you notice roots emerging through the drainage holes or circling the bottom of the pot, it’s a clear indication that your seedlings are ready for transplanting.
- Plant Size: Seedlings should have developed a few sets of true leaves and appear robust and healthy. Typically, this readiness stage occurs around 2-3 weeks after germination.
- Leaf Color: Healthy seedlings exhibit vibrant green leaves without any signs of yellowing or nutrient deficiencies. This color indicates that the plant is thriving and ready for the next stage of growth.
Timing Considerations to Avoid Shock
- Best Time of Day: Transplanting is best done in the early morning or late evening when temperatures are cooler, reducing the stress on the plants.
- Pre-Transplant Preparation: Water the seedlings thoroughly a few hours before transplanting to keep the root ball intact and minimize transplant shock.
- Environmental Stability: Ensure that the new environment (temperature, humidity, light) is stable and similar to the seedlings’ current conditions to facilitate a smooth transition.
Choosing the Right Container
- Size: Choose a container that provides ample room for root expansion. For young plants, a 1-3 gallon pot is usually adequate. As the plants grow, they may need to be transferred to larger containers, such as 5-10 gallon pots.
- Material: Containers are available in various materials, including plastic, fabric, and clay. Fabric pots (such as Smart Pots) promote air pruning and healthier root systems, while plastic pots are lightweight and affordable. Clay pots offer good stability but can be heavy and may dry out quickly.
Importance of Drainage
Ensure that the containers have sufficient drainage holes to prevent waterlogging and root rot. Poor drainage can lead to oxygen deprivation and fungal infections. You can add a layer of gravel or perlite at the bottom of the container to improve drainage and aeration.
Preparing the Soil
Use a high-quality potting mix designed for cannabis or create your own by combining organic compost, peat moss, perlite, and vermiculite. This mix should be light and well-aerated to support healthy root development. Add beneficial amendments such as worm castings, bat guano, or bone meal to enhance soil fertility. Mycorrhizal fungi can also be added to improve nutrient uptake and root health.
Ensure proper pH and nutrient levels. The ideal pH for cannabis soil is between 6.0 and 7.0. Use a pH meter or pH strips to test the soil and make necessary adjustments using pH up or pH down solutions. Ensure the soil contains balanced nutrients, particularly nitrogen, phosphorus, and potassium (NPK). During the vegetative stage, cannabis plants need higher nitrogen levels. As they transition to flowering, they will require more phosphorus and potassium.
By carefully considering these factors when preparing for transplanting, you can create an optimal environment for your cannabis plants to thrive. Proper timing, the right containers, and well-prepared soil are key to ensuring a successful transplant and robust plant growth.
Transplanting Techniques
Detailed process for safely removing seedlings from their initial containers
- Watering: Water the seedlings a few hours before transplanting to ensure the soil is moist and the root ball remains intact during the process.
- Preparation: Prepare the new container by filling it with your chosen soil mix, leaving a hole in the center large enough to accommodate the seedling’s root ball.
- Removal: Gently tap the sides of the seedling’s current container to loosen the soil. Carefully turn the container upside down, supporting the seedling with your hand, and slide the plant out.
- Inspection: Check the roots for health. White, firm roots indicate a healthy plant, while brown or mushy roots may suggest root rot.
Techniques for Minimizing Root Disturbance
Be sure to handle with care, and avoid handling the roots directly. Instead, support the root ball and the base of the stem when transferring the seedling. Keep the roots intact. If the roots are tightly wound, gently tease them apart without breaking them. This encourages better growth in the new container.
Placing Seedlings in Their New Containers
Place the seedlings into the prepared hole in the new container, ensuring the root ball is slightly below the soil surface. Gently fill in around the root ball with soil, pressing lightly to eliminate air pockets while being careful not to compact the soil too much. Water the newly transplanted seedlings thoroughly to help settle the soil around the roots and reduce transplant shock.
Common Mistakes to Avoid
- Overhandling Roots: Excessive handling or disturbing the roots can damage them and cause transplant shock. Handle seedlings gently and minimally.
- Transplanting Too Early or Too Late: Transplanting when seedlings are too small or too large can lead to poor growth. Wait until seedlings have several sets of true leaves and a robust root system.
- Improper Soil Preparation: Using the wrong soil composition or failing to amend the soil can hinder plant growth. Ensure the soil is light, well-aerated, and nutrient-rich.
Post-Transplant Care
Initial Watering and Nutrient Requirements
It is important to water your newly transplanted cannabis plant immediately after transplanting. The first watering after transplanting help the roots settle into their new environment. Continue to water regularly, keeping the soil consistently moist but not waterlogged.
Nutrients should be adjusted to meet the needs of cannabis plants during specific growth stages.
- Initial Nutrients: Use a mild, balanced fertilizer or a transplant-specific nutrient solution to support initial growth.
- Gradual Increase: Gradually increase nutrient strength as the plants establish themselves and begin to grow more vigorously.
Light and Environmental Adjustments
Adjust the light intensity to ensure seedlings receive adequate light without being scorched. LED lights should be kept at an appropriate distance. Maintain an 18/6 light schedule (18 on/ 6 off) for vegetative growth, gradually transitioning as needed for flowering. You’ll want to get to a light schedule of 12/12 when ready to flip to the flowering stage.
Maintaining Optimal Temperature and Humidity
Keep the growing area within the ideal temperature range of 70-80°F (21-27°C). Maintain humidity levels around 60-70% for the first week post-transplant, gradually reducing to 40-50% as plants grow.
Monitoring Plant Health
Signs of Transplant Shock and How to Address It
- Symptoms: Wilting, yellowing leaves, and stunted growth are common signs of transplant shock.
- Remedies: Provide consistent care, avoid overwatering, and consider using a stress-relief product like seaweed extract to aid recovery.
Regular Checks for Pests and Diseases
- Inspection: Regularly inspect plants for signs of pests or diseases, such as discolored leaves, spots, or webbing.
- Preventive Measures: Maintain a clean growing environment and use organic or chemical controls as necessary to manage any issues promptly.
Learn more about managing pests with our Integrated Pest Management Guide, including biological control agents, facility and air-handling considerations.
Nutrients and Feeding Schedule
The proper nutrients are essential during each cannabis growth stage.
- N-P-K Ratio: Seedlings require a balanced N-P-K ratio, with a slight emphasis on nitrogen for foliage growth.
- Micronutrients: Ensure the nutrient solution includes essential micronutrients like calcium, magnesium, and iron.
Organic vs. Synthetic Options
- Organic Nutrients: Derived from natural sources, they promote healthy soil biology and sustainable growth.
- Synthetic Nutrients: Offer precise control over nutrient delivery and are often easier to manage for beginners.
Nutrients After Transplanting
- Gradual Increase: Gradually increase nutrient concentration post-transplant to avoid overwhelming the plants.
- Regular Feeding: Establish a regular feeding schedule based on the growth stage and nutrient requirements of your plants.
Importance of Balanced NPK Ratios
- Vegetative Stage: Higher nitrogen levels to support leafy growth.
- Flowering Stage: Increased phosphorus and potassium to encourage bud development and overall plant health.
Supplements and Enhancers for Robust Growth
- Beneficial Microbes: Introduce mycorrhizal fungi and beneficial bacteria to enhance nutrient uptake.
- Growth Enhancers: Consider using products like seaweed extract or humic acids to promote vigorous growth and stress resistance.
Common Nutrient Deficiencies: Identifying and Correcting
- Symptoms: Learn to recognize signs of nutrient deficiencies, such as yellowing leaves (nitrogen deficiency) or purple stems (phosphorus deficiency).
- Solutions: Adjust the nutrient solution to address specific deficiencies and ensure proper pH levels for optimal nutrient absorption.
Preventive Measures to Ensure Healthy Growth
- Regular Monitoring: Regularly test soil and nutrient solution pH and EC levels.
- Balanced Diet: Provide a balanced diet of macro and micronutrients tailored to each growth stage.
Advanced Tips and Techniques
Using Mycorrhizal Fungi and Beneficial Bacteria
Benefits of Enhancing Root Health
- Improved Nutrient Uptake: Mycorrhizal fungi form a symbiotic relationship with plant roots, extending their reach and enhancing nutrient and water absorption.
- Enhanced Plant Growth: Beneficial bacteria can improve soil health by decomposing organic matter, fixing nitrogen, and protecting roots from pathogens, leading to healthier and more vigorous plant growth.
- Increased Stress Resistance: These microorganisms help plants better withstand environmental stressors, such as drought and nutrient deficiencies, by improving overall root health and resilience.
Application Methods
- Soil Amendment: Mix mycorrhizal fungi and beneficial bacteria into your soil before transplanting to ensure even distribution around the root zone.
- Root Drench: Create a solution with these microorganisms and water it directly onto the root zone after transplanting to quickly establish their presence.
- Direct Application: Dust the roots or the planting hole with mycorrhizal fungi before placing the seedlings in the new container to ensure direct contact with the roots.
Training and Pruning After Transplant
Techniques to Encourage Bushier Growth
- Topping: Remove the top of the main stem to encourage the plant to develop multiple colas instead of a single main cola, resulting in a bushier plant.
- Low-Stress Training (LST): Gently bend and tie down branches to create an even canopy and improve light penetration, promoting more uniform growth and higher yields.
- Super Cropping: Pinch and slightly crush the stems to encourage stronger growth and more bud sites, enhancing overall plant structure and yield.
Timing for Minimal Stress
- Wait for Recovery: Allow the plants to recover from transplant shock before starting any training or pruning. This typically takes about 1-2 weeks.
- Gradual Approach:Begin with less invasive techniques like LST before moving on to more aggressive methods like topping or super cropping.
- Monitor Plant Response: Pay close attention to how your plants respond to training and pruning, adjusting your techniques as needed to minimize stress.
Recap of the Transplanting Process and Its Importance
Transplanting is a critical step in cannabis cultivation that ensures your plants have the space and resources they need to grow vigorously. By understanding when to transplant, choosing the right containers, and preparing the soil properly, you can minimize stress and set your plants up for success.
Post-transplant care, including proper watering, nutrient management, and environmental adjustments, is essential for healthy growth. By following these detailed guidelines, you can ensure your cannabis plants receive the best possible care throughout the transplanting process and beyond, leading to a healthy, robust, and productive garden.
Following best practices for transplanting and subsequent care will help you cultivate strong, healthy cannabis plants that produce high yields. Pay attention to the needs of your plants at each stage, and don’t hesitate to use advanced techniques like adding beneficial microorganisms and training to optimize their growth.
Quality Genetics: the Foundation of Successful Cannabis Cultivation
Starting with high-quality seeds from a reputable source like Mosca Seeds ensures that your plants have the best potential for vigorous growth and abundant yields. By combining excellent genetics with careful transplanting and advanced cultivation techniques, you can achieve exceptional results in your cannabis garden.
Whether you’re a novice grower or a seasoned cultivator, Mosca Seeds provides the foundation for a successful harvest. Explore our wide selection of top-quality cannabis seeds and elevate your growing experience.
Mosca Seeds brings over 15 years of experience and numerous Cannabis Cup wins to the table, offering award-winning strains with superior genetics. Our expertise in cannabis genetics ensures that you get the best start for your cultivation journey. Check out the Seed Bazaar today and start your cultivation journey with quality cannabis seeds.