
Best Practices for Growers: From Germination to Harvest Part III
Part 3: Flowering, Harvest, and Beyond
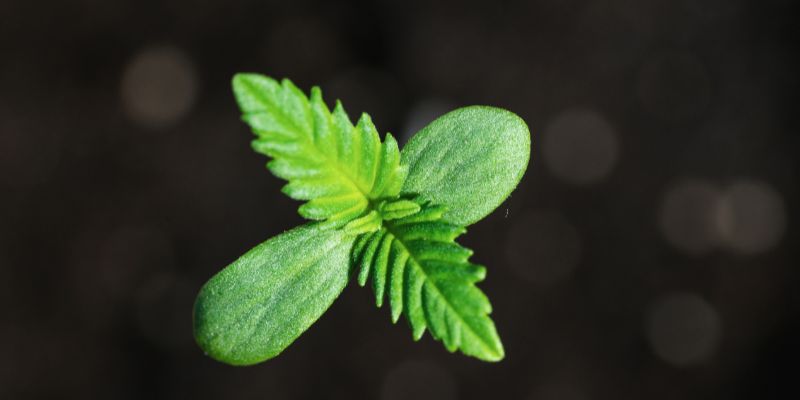
The flowering stage is where all the hard work of germination, vegetation, and training pays off. This is the final and most rewarding phase of cannabis cultivation, as plants transition from leafy green growth to producing thick, resinous buds. However, to get the best possible harvest, it’s essential to carefully manage lighting, nutrients, humidity, and temperature while keeping a close eye on bud development.
This guide will walk you through monitoring flower progression, determining the best harvest time, and post-harvest techniques such as drying, curing, and long-term storage. The proper execution of each step ensures optimal potency, flavor, and shelf life for your cannabis.
Let’s dive into flowering stage management, where everything starts coming together.
Flowering Stage Management
Light Cycle: 12/12 for Photoperiod Strains
Photoperiod cannabis plants require a 12/12 light cycle (12 hours of light, 12 hours of darkness) to trigger flowering. The dark period must be uninterrupted—even minor light leaks can confuse plants and cause stress, delaying bud production or even leading to hermaphroditism.
For autoflowering strains, this light cycle adjustment isn’t necessary, as they flower based on age rather than light exposure.
Nutrient Adjustments During the Flowering Stage
As plants shift into the flowering phase, their nutrient needs change. Phosphorus (P) and potassium (K) become more critical, supporting bud formation, while nitrogen (N) should be reduced.
- Increase phosphorus and potassium for root strength and dense bud development.
- Reduce nitrogen, as too much can lead to excess foliage instead of flower production.
- Watch for nutrient burn or deficiencies—yellowing leaves, brown tips, or slow growth could indicate imbalances.
Environmental Tweaks for Flowering
- Lower humidity levels to 40-50% to prevent mold and bud rot.
- Maintain slightly cooler temperatures during the dark period (65-75°F) to enhance trichome production.
- Improve airflow and ventilation to strengthen branches and prevent stagnant, humid air from causing mold.
With these adjustments, plants will focus their energy on producing thick, resinous buds rather than excessive leaf growth.
Monitoring Bud Development
As cannabis plants move deeper into the flowering phase, the buds begin to take shape, swell, and develop trichomes—the tiny resin glands that contain cannabinoids and terpenes. Proper monitoring ensures that you catch any issues early, avoid stress-related problems, and harvest at peak potency.
Signs of Flower Progression
- Formation of Pistils and Calyxes
- In the early flowering stage, tiny white hairs (pistils) emerge at the nodes where leaves meet the stem. These pistils will eventually darken and curl inward as the buds mature.
- Beneath the pistils, you’ll see small green formations called calyxes, which will stack and cluster to form dense buds.
- Bud Swelling and Resin Production
- Around the fourth to sixth week of flowering, buds will visibly expand as calyxes stack on top of each other.
- Trichome production increases, covering the buds and sugar leaves with a frosty, sticky coating. This is where cannabinoids like THC and CBD are concentrated.
- Buds will become heavier, denser, and more aromatic, indicating peak resin development.
- Final Ripening Stage
- In the final two weeks, buds will reach their full size and potency.
- Pistils begin to darken from white to orange, red, or brown.
- Trichomes change color, transitioning from clear to cloudy to amber, signaling readiness for harvest.
Watching for Stress
Stress during the flowering phase can negatively impact bud size, potency, and overall yield. Here are key stress factors to avoid:
- Light Leaks
- Even a small light leak during the dark period can confuse plants, leading to delayed flowering or hermaphroditism (plants producing both male and female flowers).
- Regularly check for gaps in tents, open doors, or electronic lights (power strips, timers, etc.) that could disrupt darkness.
- Environmental Fluctuations
- Sudden temperature spikes or humidity swings can slow growth, cause nutrient uptake issues, or lead to mold.
- Maintain a consistent environment with proper airflow and humidity control to prevent issues like bud rot.
- Nutrient Overload or Deficiency
- Overfeeding can lead to nutrient burn, while underfeeding can result in stunted growth.
- Monitor for leaf discoloration, curling, or burnt tips and adjust feeding schedules accordingly.
By carefully monitoring bud development and preventing stress, growers can maximize resin production and ensure a flavorful, potent final product.
When to Harvest Cannabis
Knowing when to harvest is one of the most critical decisions in cannabis cultivation. Harvesting too early results in underdeveloped buds with lower potency, while harvesting too late can lead to a more sedative effect due to THC degradation. Proper timing ensures peak potency, flavor, and smoothness in the final product.
Trichome Examination: The Best Way to Determine Harvest Readiness
Trichomes are tiny, crystal-like resin glands found on the buds and sugar leaves. They contain the cannabinoids and terpenes responsible for potency and aroma. Observing trichome color under a jeweler’s loupe or digital microscope is the most reliable way to determine harvest readiness.
- Clear Trichomes – Buds are still immature, with low THC levels. Wait longer for peak potency.
- Cloudy/Milky Trichomes – THC levels are at their highest, producing a balanced, euphoric effect. Ideal for most growers.
- Amber Trichomes – THC is starting to degrade into CBN, resulting in a more sedative, couch-lock high.
Most growers aim to harvest when 70-80% of trichomes are cloudy with some amber mixed in for a well-rounded effect.
Pistil Color as an Additional Indicator
Pistils—the fine hairs that emerge from the buds—also change color as the plant matures. While not as reliable as trichomes, they can serve as a secondary visual cue.
- White Pistils – Buds are still developing. Not ready for harvest.
- Orange/Brown Pistils (50-70%) – Buds are nearing peak maturity. Good time to check trichomes.
- Darkened, Curled Pistils (80-90%) – The plant is at full ripeness and ready for harvest.
Since different strains mature at different rates, combining trichome observation with pistil color helps confirm the ideal harvest window.
Flushing: Preparing for a Smoother Smoke
Flushing cannabis is the process of removing excess nutrients from the plant before harvest to improve the taste and smoothness of the final product. If plants retain too many nutrients, the buds may have a harsh, chemical-like taste when smoked.
- Begin flushing 1-2 weeks before harvest by watering plants with pH-balanced water only (no nutrients).
- This forces the plant to use up any remaining stored nutrients, enhancing flavor and aroma in the final cured product.
- Leaves may turn yellow during flushing, which is normal as the plant consumes its remaining nutrients.
By following these steps, growers can ensure maximum potency, smooth smoke, and optimal flavor in their final harvest. Learn more about when to harvest cannabis plants.
Harvesting Techniques
Once the trichomes indicate that the buds are ripe for harvest, it’s time to cut, trim, and prepare them for drying and curing. The way you trim and handle your buds at this stage directly impacts their final potency, aroma, and appearance.
Wet Trimming vs. Dry Trimming
Trimming is the process of removing excess leaves from the buds. There are two main methods—wet trimming and dry trimming—each with its own advantages and drawbacks.
Wet Trimming (Trimming Before Drying)
- Pros:
- Easier to trim when leaves are fresh and soft.
- Reduces excess moisture, helping buds dry faster.
- Less chance of mold formation in humid environments.
- Cons:
- The process can be messy due to the stickiness of fresh resin.
- Some terpenes may evaporate more quickly due to increased surface exposure.
Dry Trimming (Trimming After Drying)
- Pros:
- Buds retain more moisture for a slower, more controlled dry.
- Less sticky mess during trimming.
- Some growers believe it preserves more terpenes.
- Cons:
- Leaves shrink and curl around the buds, making trimming more difficult.
- Takes longer to dry, increasing the risk of mold in high-humidity environments.
The best trimming method depends on your climate and drying setup. If you live in a humid area, wet trimming helps prevent mold. If you’re in a dry climate, dry trimming can slow down the drying process and preserve terpenes.
Bud Handling: Protecting Those Precious Trichomes
Cannabis buds are covered in delicate trichomes containing cannabinoids and terpenes that determine potency, aroma, and effects. Rough handling can damage trichomes, reducing quality.
Best practices for handling buds:
- Always wear gloves to prevent sticky resin from sticking to your fingers.
- Use sharp trimming scissors for precise cuts without crushing delicate buds.
- Handle buds as little as possible to avoid knocking off trichomes.
Once trimming is complete, the next step is proper drying and curing, which makes all the difference in flavor, smoothness, and overall quality.
Drying and Curing Cannabis
Drying and curing are essential steps that preserve cannabinoids and terpenes, ensuring a smooth, potent smoke. Rushing or skipping these steps can ruin an otherwise perfect harvest.
Drying Environment: The Key to Preserving Quality
Proper drying removes excess moisture without overdrying the buds. Drying too fast can cause the outer layer to become brittle while trapping moisture inside, increasing the risk of mold.
Ideal drying conditions:
- Temperature: 60-70°F (15-21°C)
- Humidity: 50-60%
- Drying time: Typically 5-10 days, depending on climate and bud density
- Air circulation: A gentle fan helps prevent mold but should not blow directly on the buds
Hang buds upside down on drying racks or lines in a dark room with good airflow. Smaller popcorn buds can be placed on mesh drying trays.
To check if the buds are dry, bend a small stem—if it snaps instead of bending, they’re ready for curing.
Curing Process: The Secret to Smooth, Potent Buds
Curing is the process of slowly aging dried buds in airtight containers, allowing them to develop a smoother smoke, richer flavors, and stronger potency.
How to cure cannabis properly:
- Use glass jars (mason jars work best) and fill them about ¾ full, leaving space for airflow.
- Store jars in a cool, dark place at 60-65% humidity.
- Burp jars daily for the first 1-2 weeks to release excess moisture and allow fresh air in.
- After two weeks, burping can be reduced to once every few days.
- Curing for 4-6 weeks improves potency, aroma, and smoothness, but some growers cure for months for the best results.
Common Drying and Curing Mistakes to Avoid
- Over-drying buds before curing can result in harsh smoke and weaker flavors.
- Skipping burping can lead to trapped moisture and mold growth inside the jars.
- Using plastic bags instead of jars can degrade terpenes and increase contamination risks.
When done correctly, drying and curing enhance the overall smoking experience, bringing out the full potential of the strain’s flavors, effects, and smoothness.
Cannabis Packaging and Storage Techniques
Once your cannabis has been properly dried and cured, long-term storage is crucial for maintaining potency, flavor, and freshness. Properly stored buds can last for months or even years without losing their quality.
To keep your cannabis in peak condition, store it in a cool, dark, and airtight environment. Light, heat, and air exposure can degrade cannabinoids and terpenes, reducing potency and altering the experience.
Best practices for cannabis storage:
- Use airtight containers: Glass mason jars or vacuum-sealed containers help preserve freshness. Avoid plastic bags, which can cause static and degrade trichomes.
- Maintain humidity levels: Store cannabis at 55-62% relative humidity using humidity control packs (such as Boveda or Integra Boost) to prevent overdrying or mold.
- Keep in a dark, cool place: Store jars in a cupboard or drawer at 60-70°F (15-21°C) to prevent cannabinoid degradation. Never store cannabis in the fridge or freezer—excess moisture can lead to mold, and frozen trichomes can become brittle and break off.
With the right storage methods, cannabis can maintain its full potency and flavor for up to a year or longer.
Labeling for Easy Identification
Proper labeling helps keep track of different strains and their effects. Write down:
- Strain name
- Harvest date
- THC/CBD levels (if tested)
- Terpene profile (if known)
For long-term storage, regularly inspect buds for any signs of mold or degradation and rotate jars occasionally to prevent compression.
Conclusion and Final Tips
After following this three-part guide, you now have a complete understanding of the cannabis growing process—from germination to harvest, drying, curing, and storage. Mastering each stage ensures the highest-quality yield possible and allows you to fine-tune your approach for future grows.
Recap of the Three Parts
- Part 1: Germination, grow setup, and hydroponic vs. soil cultivation.
- Part 2: Vegetative growth, nutrient management, pest control, and sexing plants.
- Part 3: Flowering, harvesting, drying, curing, and storage techniques.
Encouragement for New Growers
Growing cannabis takes time, patience, and attention to detail, but the reward is worth it. Each grow provides a learning experience, helping you refine your techniques and produce better results with every cycle. Don’t be discouraged by mistakes—even experienced growers face challenges.
This guide provides a comprehensive roadmap for new growers, ensuring a successful, high-quality cannabis harvest. If you have any additional questions or want to explore more cultivation tips, check out our section on How to Grow Cannabis.
Mosca Seeds has been providing high-quality cannabis genetics for over 15 years, helping growers achieve bigger yields and better results. Whether you’re just starting or looking to perfect your cultivation techniques, explore our premium seed selection to find the ideal strains for your next grow. Check out the Seed Bazaar today and start your journey to top-tier cannabis cultivation.